msw
msw 없을때에는 process.env.NODE_ENV로 구분해서 개발, 운영 api주소를 따로 만들어 사용해야했다.
msw를 사용하면 개발환경, 운영환경 구분없이 실제주소로만 요청 보내면 된다.
개발환경에서만 서비스워커를 실행해서 실제주소로 가는 요청을 가로채면 된다.
msw는 오류를 내거나, 로그인을 하지 않아도 되는 환경을 만들어 테스트하기 용이하다.
설치하기
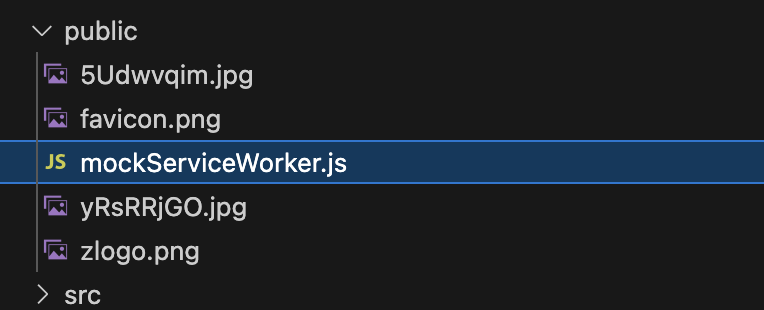
npx msw init public/ --save
public 폴더에 설치하면 mockServiceWorker 파일이 생긴다.
요청을 보내면 serviceWorker가 요청을 가로채서 원하는 response로 내려주는 기능을 한다.
package.json에도 추가해준다.
npm install msw@latest --save-dev
app 폴더 형제폴더로 mocks 폴더를 만들어준다.
Next 프로젝트는 server, client 두개가 필요하다.
mocks
- browser.ts
- http.ts
- handlers.ts (실제 응답코드가 들어가는 파일)
//browser.ts

import { setupWorker } from 'msw/browser'
import { handlers } from './handlers'

// This configures a Service Worker with the given request handlers.
const worker = setupWorker(...handlers)

export default worker;
// http.ts
import { createMiddleware } from '@mswjs/http-middleware';
import express from 'express';
import cors from 'cors';
import { handlers } from './handlers';
const app = express();
const port = 9090;
app.use(cors({ origin: 'http://localhost:3000', optionsSuccessStatus: 200, credentials: true }));
app.use(express.json());
app.use(createMiddleware(...handlers));
app.listen(port, () => console.log(`Mock server is running on port: ${port}`));// handlers.ts
import {http, HttpResponse, StrictResponse} from 'msw'
import {faker} from "@faker-js/faker";
const User = [
{id: 'elonmusk', nickname: 'Elon Musk', image: '/yRsRRjGO.jpg'},
{id: 'zerohch0', nickname: '제로초', image: '/5Udwvqim.jpg'},
{id: 'leoturtle', nickname: '레오', image: faker.image.avatar()},
]
export const handlers = [
http.post('/api/login', () => {
console.log('로그인');
return HttpResponse.json(User[1], {
headers: {
'Set-Cookie': 'connect.sid=msw-cookie;HttpOnly;Path=/'
}
})
}),
http.post('/api/logout', () => {
console.log('로그아웃');
return new HttpResponse(null, {
headers: {
'Set-Cookie': 'connect.sid=;HttpOnly;Path=/;Max-Age=0'
}
})
})
];
필요한 패키지 설치한다.
npm i -D @mswjs/http-middleware express cors
npm i --save-dev @types/express @types/cors
package.json에서 스크립트 추가해서 서버를 띄운다.
터미널을 하나 더 띄워서 mock 서버를 띄어준다.
"scripts": {
    "mock": "npx tsx watch ./src/mocks/http.ts"
}
Next 앱에서 언제 msw를 적용해야하는지 설정을 해준다.
공통 위치에 _component/MSWComponent.tsx 클라이언트 컴포넌트를 만든다.
//MSWComponent.tsx

"use client";
import { useEffect } from "react";

export const MSWComponent = () => {
  useEffect(() => {
    if (typeof window !== 'undefined') {
      if (process.env.NEXT_PUBLIC_API_MOCKING === "enabled") {
        require("@/mocks/browser");
      }
    }
  }, []);

  return null;
};
전체레이아웃에서 {children} 형제요소로 넣어준다.
// app/layout.tsx

import type { Metadata } from 'next'
import { Inter } from 'next/font/google'
import './globals.css'
import {MSWComponent} from "@/app/_component/MSWComponent";

const inter = Inter({ subsets: ['latin'] })

export const metadata: Metadata = {
  title: 'Create Next App',
  description: 'Generated by create next app',
}

type Props = {
  children: React.ReactNode,
};
export default function RootLayout({
  children,
}: Props) {
  return (
    <html lang="en">
      <body className={inter.className}>
      <MSWComponent />
      	{children}
      </body>
    </html>
  )
}
.env 파일에 환경변수를 추가해준다.
NEXT_PUBLIC_API_MOCKING=enabled // msw를 실행할때는 enabled를 켜준다.
개발환경, 배포환경 다르게 .env 파일을 가져가면 환경에 맞춰 알아서 활성화된다.
.env
.env.local
NEXT_PUBLIC_API_MOCKING=enabled
NEXT_PUBLIC 프리픽스가 있으면 브라우저에서 접근할수있는 환경변수
NEXT_PUBLIC_API_MOCKING=enabled // 브라우저에서 접근 가능, 유출이 될 수 있다.
API_MOCKING=enabled // 서버에서만 접근 가능
set-cookie
https://developer.mozilla.org/en-US/docs/Web/HTTP/Headers/Set-Cookie
server action
https://nextjs.org/docs/app/building-your-application/data-fetching/server-actions-and-mutations
13버전 실험적, 14버전에 정식으로 나옴
간단히 서버액션은 무엇인가 ? https://ssund.tistory.com/156
클라이언트 컴포넌트에서 server action 사용할 때
함수 선언안에 'use server'라고 명시해 준다. 그럼 브라우저에 노출되지 않는다. 키값 비밀값을 사용해도 된다.
프론트 서버에서 작동하는것
'use client'

export default funtion SignupModal() {
 const submit = async(formData: formData) => {
     'use server'
 }
}
서버 action 사용하면 좋은점
db와 같은 서버자원에 더 빠르게 접근 가능하다.
fetch 함수에 credentials: 'includes'가 있어야 쿠키가 전달이 된다.
redirect는 try catch 문 안에 사용하면 안된다. 대신 flag 변수를 만들어 사용한다.
let shouldRedirect = false;

try {
  const response = await fetch('url', {
    method: 'post',
    body: formData,
    credentials: 'include'
  })

  shouldRedirect = true;
} catch(err) {
  console.log(err)
}

if (shouldRedirect) {
  redirect('/home')
}
서버액션을 따로 폴더를 _lib 폴더라고 만들어서 정리해두는게 좋다.
useFormState, useFormStatus
둘다 react hook
useFormState - form 액션의 결과에 기반하여 상태를 업데이트할 수 있게 해주는 Hook이다.
form에서 submit에 서버액션을 넘겨서 사용할 수있도록 해준다.
useFormStatus -마지막 양식 제출의 status 정보를 제공하는 Hook이다.
form에서 submit 된 method, data, pending 등 정보를 제공한다
const [state: formData, formAction] = useFormState(onSubmit, { message: null })
const {pending: boolean} = useFormStatus();

//server action
export default async(prevState: any, formDatat: formData)
참고 https://e-juhee.tistory.com/entry/React-useFormState-useFormStatus
auth.js
다양한 oAuth provider를 제공하고 있어 간편로그인을 쉽게 붙일 수 있다.
5버전 설치하기
npm i next-auth@5 @auth/core
app 폴더 형제 위치에 auth.ts, middleware.ts를 추가한다.
pages - 회원가입, 로그인 페이지 연결
providers 에 필요한 로그인 모듈 붙이기
CredentialsProvider는 아이디, 비번 로그인
next auth 에서 아이디, 비번을 받는 object가 정해져 있어서 규격에 맞게 사용해야한다.
credentials.username - id
credentials.password - password
// auth.ts

import NextAuth from "next-auth"
import CredentialsProvider from "next-auth/providers/credentials";
import {NextResponse} from "next/server";

export const {
  handlers: { GET, POST }, // api route
  auth, // 로그인 유무 확인
  signIn, // 로그인
} = NextAuth({
  pages: {
    signIn: '/i/flow/login',
    newUser: '/i/flow/signup',
  },
  providers: [
    CredentialsProvider({
      async authorize(credentials) {
        const authResponse = await fetch(`${process.env.NEXT_PUBLIC_BASE_URL}/api/login`, {
          method: "POST",
          headers: {
            "Content-Type": "application/json",
          },
          body: JSON.stringify({
            id: credentials.username,
            password: credentials.password,
          }),
        })

        if (!authResponse.ok) {
          return null
        }

        const user = await authResponse.json()
        console.log('user', user);
        return {
          email: user.id,
          name: user.nickname,
          image: user.image,
          ...user,
        }
      },
    }),
  ]
});
미들웨어
config에 matcher 미들웨어를 적용할 라우트 선언
미들웨어가 생기면서 라우트 이동시 로그인유무를 확인해 라우트에 접근할수있는지 체크가 가능해졌다.
로그인했으면 라우트이동, 로그인안한경우 로그인페이지로 redirect 시키기
// middleware.ts

import { auth } from "./auth"
import {NextResponse} from "next/server";

export async function middleware() {
  const session = await auth();
  if (!session) {
    return NextResponse.redirect('http://localhost:3000/i/flow/login');
  }
}

// See "Matching Paths" below to learn more
export const config = {
  matcher: ['/compose/tweet', '/home', '/explore', '/messages', '/search'],
}
API Routes
https://nextjs.org/docs/pages/building-your-application/routing/api-routes
app/api/auth/[...nextauth]/route.ts 를 만들어준다.
[...nextauth] 는 catch-all segments, 어떤 주소든지 들어갈수있다.
https://nextjs.org/docs/app/building-your-application/routing/dynamic-routes#catch-all-segments
next auth 에 auth.ts 파일에 GET,POST를 import 해서 사용하면 된다.
export { GET, POST } from '@/auth';
프론트 서버와 백엔드 서버를 나누면좋은점
백엔드 서버에 요청이 많아지는경우 서버를 백엔드 서버만 증설하면 된다.
fetch url를 process.env.NEXT_PUBLIC_BASE_URL를 사용한다.
.env파일에 쿠키를 암호화 시킬 시크릿 키를 추가한다.
AUTH_SECRET=시크릿키
클라이언트에서는 next-auth가 제공하는 signIn을 사용할 수있다.
import { signIn } from 'next-auth/react'

await signIn("credentials", {
    username: id, // next-auth 고정으로 받는 키
    password, // next-auth 고정으로 받는 키
    redirect: false, //서버에서하는 redirect
})

// 클라이언트에서 redirect 코드를 따로 넣어준다.
router.replace('/home')
서버에서는 우리가 만들어준 auth.ts 파일에 있는 signIn을 사용한다.
import { signIn } from "@/auth";
import {useSession} from 'next-auth/react'
클라이언트 컴포넌트에서 사용할 수 있는 사용자 정보를 가져올 수있은 훅
const { data } = useSession();

if (data?.user) {
	return <div>로그인 됨</div>
}

return (
	<div>로그인 안됨요 </div>
)
서버에서 사용하기
import { auth } from '@/auth';

const session = await auth();

return (
	<div>
    	{session.user && <div>로그인 됨 </div>}
    </div>
)'NOTE' 카테고리의 다른 글
| [Next + React Query로 SNS 서비스 만들기] 섹션 4 정리 (1) | 2024.09.12 |
|---|---|
| [Next + React Query로 SNS 서비스 만들기] 섹션 3-2 정리 (react-query, Suspense) (0) | 2024.08.24 |
| Next serverActions (0) | 2024.08.10 |
| [Next + React Query로 SNS 서비스 만들기] 섹션 2 정리 (0) | 2024.08.05 |
| [Next + React Query로 SNS 서비스 만들기] 섹션 1 정리 (0) | 2024.07.21 |