
노마드코더 NextJS 를 보고 정리한 내용입니다.
NEXTJS 설치
npx create-next-app@latest
라이브러리와 프레임워크의 차이
라이브러리
원할때 사용할 수있다. 앱을 만드는데 자유도가 있다.
프레임워크
프레임워크가 정한 규칙을 지켜야한다.
다른설정없이도 규칙만 지키면 동작한다. 커스텀이 제한된다.
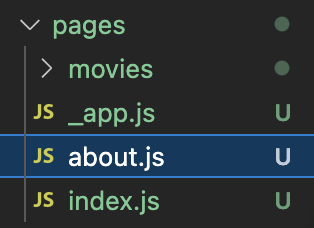
pages
nextjs 프로젝트 내 pages폴더에 파일을 넣으면 파일이름이 url로 들어간다.
localhost:3000/aboout
CSR, SSR
CSR - Client Side Rendering
브라우저가 자바스크립트를 가져와서 UI를 만든다.
네트워크가 느리면 화면이 늦게 노출 될 수있어서 로딩처리를 해야한다.
소스보기를 하면 root dom을 확인할 수 있다.
<div id="root"></div>
SSR - Server Side Rendering
앱에있는 페이지들이 pre-rendering되는 것
유저가 페이지를 요청하면 서버에서 html을 내려준다.
자바스크립트와 react.js가 로드되지 않아도 콘텐츠를 바로 확인할 수있다.
장점: SEO 좋다.
Routing
Link라는 앱 내에서 페이지를 네비게이트할 때 사용해야하는 특정 컴포넌트가 존재한다.
// 기존에는 Link 태그안에 a태그를 넣어줘야했지만
<Link href="/about">
  <a>about</a>
</Link>

// next13부터 a태그 안써준다.
// 기존에는 Link내 a태그에 props를 내려줘야 적용이 되었지만
// next13부터는 link에 내려줘도 된다.
<Link href="/about" style={{ border: '1px solid red' }}>
  about
</Link>
리액트처럼 react-router-dom 라이브러리를 설치하지 않아도
next는 다 내장되어있기 때문에 router를 사용할 수있다.
import Link from 'next/link';
import { useRouter } from 'next/router';

const NavBar = () => {
  const router = useRouter();
  return <nav>
    <Link href="/" style={{color: router.pathname === '/' ? 'red': 'blue' }}>
      홈
    </Link>
    <Link href="/about" style={{color: router.pathname === '/about' ? 'red': 'blue' }}>
      about
    </Link>
  </nav>
}

export default NavBar;
module.css
module.css 을 사용할때 여러개의 클래스를 적용해야한다면
1. 백틱을 이용하는 방법
<Link href="/" className={`${styles.link} ${router.pathname === '/' ? styles.active : ''}`}>홈</Link>
2. array로 만들어 join하는 방법
<Link href="/about" className={[styles.link, router.pathname === '/about' ? styles.active : ''].join(" ")}>about</Link>
styled jsx
nextJS 고유의방법
styled jsx는 컴포넌트안에서만 적용된다. 다른 컴포넌트에 적용되지 않는다.
import Link from 'next/link';
import { useRouter } from 'next/router';

const NavBar = () => {
  const router = useRouter();
  return <nav>
    <Link href="/" className={router.pathname === '/' ? 'active' : ''}>홈</Link>
    <Link href="/about" className={router.pathname === '/about' ? 'active' : ''}>about</Link>
    <style jsx>{`
        nav {
          background-color: tomato;
        }
        a {
          text-decoration: none;
        }
        .active {
          color: yellow;
        }
    `}</style>
  </nav>
}

export default NavBar;
글로벌 스타일 적용할 때
모든컴포넌트의 root 컴포넌트에 글로벌 스타일 선언
<style jsx global>{`
  nav {
  	background-color: tomato;
  }
  a {
  	text-decoration: none;
  }
  .active {
  	color: yellow;
  }
`}</style>
_app.js
없어도 nextjs가 만들어서 잘 작동하게 해주지만
커스텀 하고싶을때 pages/_app.js 파일을 만들어서 커스텀을 해준다.
_app컴포넌트에서 아래의 코드들을 추가할 수 있다.
- Google analytics
- 검색엔진 설정
- 스크립트 분석
_app.js에서 공통레이아웃을 설정할 수 있지만
공통레이아웃은 components/layout.js 파일을 만들어서 _app 컴포넌트를 children으로 받아서 사용한다.
// pages/_app.js

// Component, pageProps는 next가 정해놓은 규칙
// Component에는 렌더링되는 컴포넌트가 들어간다.
const App = ({ Component, pageProps }) => {
  return <Component {...pageProps} />
}

export default App;
Head
next에서 head에 들어가는 속성(title, meta 등등...) 변경할수있는 컴포넌트
nextJS의 멋진 점! 작은패키지를 별도 설치없이 사용할 수 있다는 점
create-react-app으로 진행하는경우 react helmet이라는 패키지를 설치해서 사용해야하는데
next는 기본내장 되어있다.
import Head from 'next/head';
import NavBar from "@/components/NavBar";

const Index = () => {
  return (
    <div>
      <Head>
        <title>Home</title>
      </Head>
      <NavBar />
    </div>
  )
}

export default Index;
public
next.js를 이용하면 public파일을 쉽게 다룰수 있다.
public 파일을 public 디렉토리에 넣으면 된다.
<img src="/react-hooks.png" /> //경로만 입력해주면 된다.
redirect
next.config.js에 redirects 설정을 할 수있다.
외부경로로도 redirect할 수 있다.
경로가 변경된 경우 redirect를 시켜줄수있다.
permanent 속성관련 참고
https://forlater.tistory.com/371
permanent: true - 영구적으로 url 변경되었으니, 추후에 바뀐url로 이용해달라는 것
permanent: false - 임시적으로 url 변경
// next.config.js
const nextConfig = {
  reactStrictMode: true,
  async redirects(){
    return [
      {
        // contact로 접근하면 form으로 경로가 redirect된다. 외부경로로도 redirect할 수 있다.
        source: "/contact",
        destination: "/form",
        // permanent 영구적 리다이렉트, 임시적 리다이렉트
        permanent: false
      }
    ]
  }
}

module.exports = nextConfig
동적 경로를 redirect 하는경우
:path* "*"를 넣어주면 뒤에 모든 패스를 의미한다.
// boards/111 redirect(0)
// boards/11/222 redirect(x)
{
  source: "/boards/:path",
  destination: "https://www.naver.com",
  permanent: false
}


// boards/11/222 redirect(0)
{
  source: "/boards/:path*",
  destination: "https://www.naver.com",
  permanent: false
}
rewrite
유저가 rewrite되기 전 url를 확인할 수 없다.
이것으로 API_KEY를 숨길수 있다.
url에 마스크를 씌워주는 역활
//next.config.js
const API_KEY = process.env.API_KEY;

const nextConfig = {
  reactStrictMode: true,
  async rewrites() {
    return [
      {
        source: "/api/movies",
        destination: `https://api.themoviedb.org/3/movie/popular?api_key=${API_KEY}`
      }
    ]
  }
}

module.exports = nextConfig
//.env
API_KEY=*****************************// index.js
useEffect(() => {
(async() => {
// /api/movies써주면 https://api.themoviedb.org/3/movie/popular?api_key=${API_KEY}를 호출
const {results} = await (await fetch('/api/movies')).json();
setMovies(results)
})()
}, []);
SSR
서버렌더링 할 수있는 getServerSideProps가 있다.
getServerSideProps는 서버에서만 실행되는 코드, API키를 숨길 수도 있다.
getServerSideProps 네이밍 변경은 안된다.
getServerSideProps에서 return하는 객체는 _app.js에서 pageProps로 받는다.
서버에서 data fetch를 하고 html을 그려주기때문에 모든데이터를 html에서 확인할 수 있다.
// server에서 받은 movies props
const Index = ({ movies }) => {
  return (
    <div>
      {!movies && <div>Loading....</div>}
      <ul>
        {movies?.map((movie => <li key={movie.id}>{movie.original_title}</li>))}
      </ul>
    </div>
  )
}

//서버에서 돌아가는 코드
export async function getServerSideProps() {
  const {results} = await (await fetch('http://localhost:3000/api/movies')).json();

  // props키를 가진 object를 return
  // return하면 page컴포넌트의 props로 받을 수 있다.
  return {
    props: {
      movies: results
    }
  }
}

export default Index;
getServerSideProps는 context(url 정보)를 받아올 수 있다.
export async function getServerSideProps(ctx) {
  console.log(ctx);

  return {
    props: {}
  }
}
중첩라우팅
movies/[id].js 대괄호를 써서 파일명을 만들어주면 된다.
대괄호 안에 들어간 값을 router로 받을 수 있다.
여러 파라미터가 들어가는 경우
[...id].js 파일명으로 만들면 된다.
/movies/631842/11/22로 접근한 경우
url에 path가 array가 된다.

라우터로 여러파라미터 보내기
const onClick = (id, title) => {
  // router.push('전달하고싶은 real url', 'user에게 보여지는 url')
  router.push(
    {
      pathname: '/movies/${id}',
      query: {
      	id: id,
      	title: title,
      }
    },
    `/movies/${id}`
  );
}

// Link에서도 가능하다
<Link
  href={{
      pathname: '/movies/${id}',
      query: {
      	id: id,
      	title: title,
      }
    }}
  as={`/movies/${movie.id}`}
></Link>
as를 쓰지 않는경우

as를 써서 보여주고 싶은 url 지정한 경우

이동한 페이지에서 router 파라미터 확인

이동하려는 페이지 url에 영화타이틀과 같은 정보를 넣어주면 seo측면에서 더 유리할 수 있다.
router.query를 사용하는게 아니라 url path로 넣어준다.
ex) movies/영화이름/111
링크를 클릭하는게 아니라 url로 바로접근하는경우
상세페이지에서 pre-render로 서버에서는 router.query.params가 배열인것을 확인할 수 없어서
없는경우 빈배열로 초기화를 시켜줘야한다.
getServerSideProps에 context를 사용해서 url정보를 가져올 수 있다.
fetch를 위한것이 아닌 더 빠른 데이터 접근을 위해서 context로 접근해서 사용할 수있다.
context로 가져온 정보를 컴포넌트 props로 전달하면
html파일에도 정보가 들어가있는 것을 확인할 수있다.
'TECH' 카테고리의 다른 글
| HTTP 프로토콜 (0) | 2023.04.17 |
|---|---|
| HTTP 상태코드 (0) | 2023.04.17 |
| React Hooks (0) | 2023.03.08 |
| React 기본개념 (0) | 2023.03.08 |
| Framer Motion 애니메이션 라이브러리 (0) | 2023.03.06 |